Imagine this: the thermostat hits 78°, the fan sputters, and the whole house feels like a sauna. You’re staring at a silent unit while the desert heat presses in, and the only thing you want is cold air, not a mystery.
In North Las Vegas, the desert’s relentless swing from blistering days to chilly nights puts extra stress on every furnace, heat pump, and air conditioner. One tiny glitch can snowball into a costly repair if you don’t catch it early.
That’s why we’ve mapped out a no‑nonsense, step‑by‑step roadmap to pinpoint the problem before it drains your wallet. From the obvious clues to the hidden culprits, we’ll walk you through each check‑point so you can decide whether it’s a DIY fix or a call for a pro.
So grab a cold drink, roll up your sleeves, and let’s dive into the first sign that something’s off—because the sooner you know, the sooner you’ll feel that sweet, cool relief again.

Quick Visual Inspection: Spotting the Obvious Issues
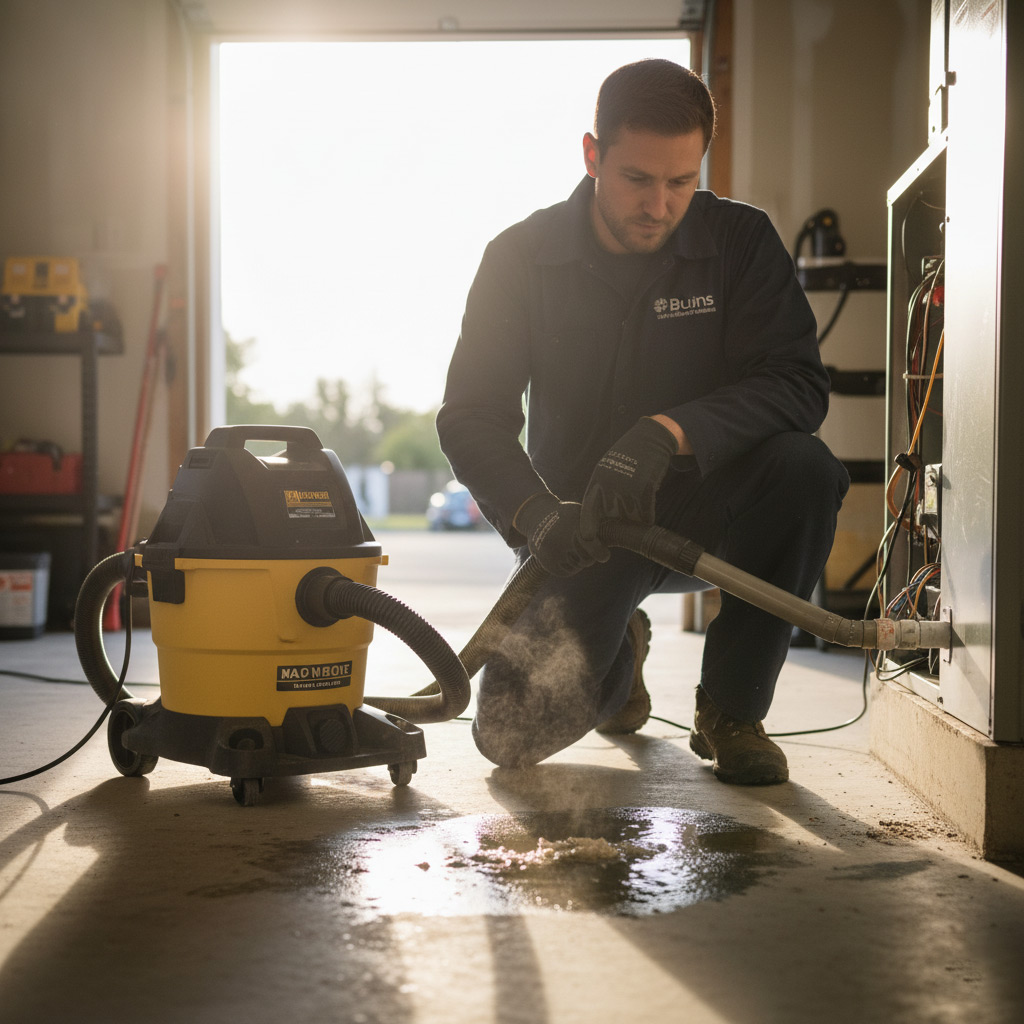
Before you start pulling wires or calling a tech, give the unit a once‑over. A fresh pair of eyes can catch a loose panel, a broken fan blade, or a puddle of water that screams “something’s wrong.” In the desert heat, even a tiny blockage can turn a working system into a furnace.
What to Scan First
- Exterior casing: Look for dents, rust, or missing screws that could let dust in.
- Condensate drain: Is there standing water or a clogged line?
- Air filter: A dark, clogged filter is a red flag for reduced airflow.
- Fan blades: Check for cracks or debris that might jam the motor.
- Thermostat display: Any error codes or flashing lights?
If anything on that list looks off, you’ve already narrowed the problem down to a handful of cheap fixes. Clean or replace the filter, clear the drain, tighten loose panels, and you might just restore comfort without a service call.
Thermostat Settings and Calibration Checks
Is the thermostat talking the same language as your HVAC?
First, make sure the unit is set to cool and not “fan‑only.” A simple slip can leave you sweating while the system runs idle. Verify the mode button, then glance at the temperature display – it should match the room’s actual feel.
Temperature accuracy matters
Grab a reliable digital thermometer and place it about three feet from the thermostat, away from direct sunlight or drafts. If the reading differs by more than 2°F, the thermostat is likely out of sync.
- Turn the thermostat dial up or down in 1°F increments.
- Wait five minutes for the system to respond.
- Re‑measure and note the new gap.
When the gap stays wide, you’ve got a calibration issue that needs a professional’s touch.
Battery check – the silent saboteur
Many wall‑mounted thermostats run on AA or AAA batteries. Low power can cause erratic behavior, like random temperature spikes or a dead display. Replace the batteries with fresh ones and watch the unit reboot.
Programmed schedules – friend or foe?
Modern thermostats let you set daily or weekly programs. If you’ve recently changed your routine, the schedule might still be stuck on “away” mode. Open the schedule menu and:
- Confirm the current day’s settings.
- Disable any “hold” or “vacation” overrides.
- Save changes and let the system run for a full cycle.
Getting the schedule right can instantly restore comfort without a single wrench.
Airflow, Filters, and Ductwork Evaluation
Check the Filter First
Before you tear the house apart, pull the front panel and look at the filter. A clogged filter chokes the system and makes the blower work harder than it should.
If the filter looks dark, dusty, or feels gritty to the touch, replace it right away. A fresh filter can restore up to 15% of lost efficiency.
- Standard 1‑month replacement for homes in North Las Vegas.
- High‑MERV filters for allergy‑prone households.
- Reusable washable filters – clean them every 2‑3 weeks.
Inspect Ducts for Blockages & Leaks
Next, walk the perimeter of each vent and give it a quick visual scan. Any visible dust buildup or a whistling sound usually means something’s obstructing the flow.
Open the biggest supply vent in the living room and feel the air. If it’s weak on one side, you probably have a leak or a kinked duct.
- Seal gaps with foil‑backed duct tape – not the cheap kind.
- Use a flashlight to spot crushed or disconnected sections.
- Consider a professional duct‑blaster test if you suspect hidden leaks.
Measure the Flow
Grab a handheld anemometer (or borrow one from a neighbor) and take a reading at each vent. Good airflow is roughly 350‑400 CFM for a 12‑inch register.
Low numbers point to a blockage, a failing blower motor, or an undersized duct. Fix the obvious first – clean the coil, replace the filter, seal the ducts – then call a tech if the numbers stay low.
Electrical Components, Fuses, and Safety Switches
Power check: the first line of defense
Before you start pulling wires, make sure the unit is actually getting power. A tripped breaker or a blown fuse can masquerade as a full‑blown system failure.
Grab your flashlight, open the service panel, and look for:
- Breaker that’s off – flip it back on and listen for a click.
- Fuses that look blackened or cloudy – replace with the exact rating.
- Loose or corroded connections – tighten with a screwdriver, but don’t over‑tighten.
Safety switches: the unsung heroes
Most modern HVAC units have a high‑limit switch and a pressure switch. If either trips, the system shuts down to protect itself.
Test them by:
- Locating the high‑limit thermostat near the furnace blower.
- Pressing the reset button (if present) and watching for a brief hum.
- Checking the pressure switch for a broken hose or clogged vent.
If the switch won’t stay reset, you’ve likely got a deeper issue like overheating or low refrigerant pressure – time to call a pro.
Wiring health: spot the red flags
Inspect the thermostat wiring, control board, and any visible cords. Look for frayed insulation, burnt spots, or loose terminals.
Quick fixes you can do yourself:
- Strip back a tiny bit of insulation on a cracked wire and re‑connect.
- Apply a dab of dielectric grease to prevent future corrosion.
- Snap any loose connector clips back into place.
If you see melted plastic or a strong ozone smell, shut the system off immediately and let a licensed technician handle the repair.

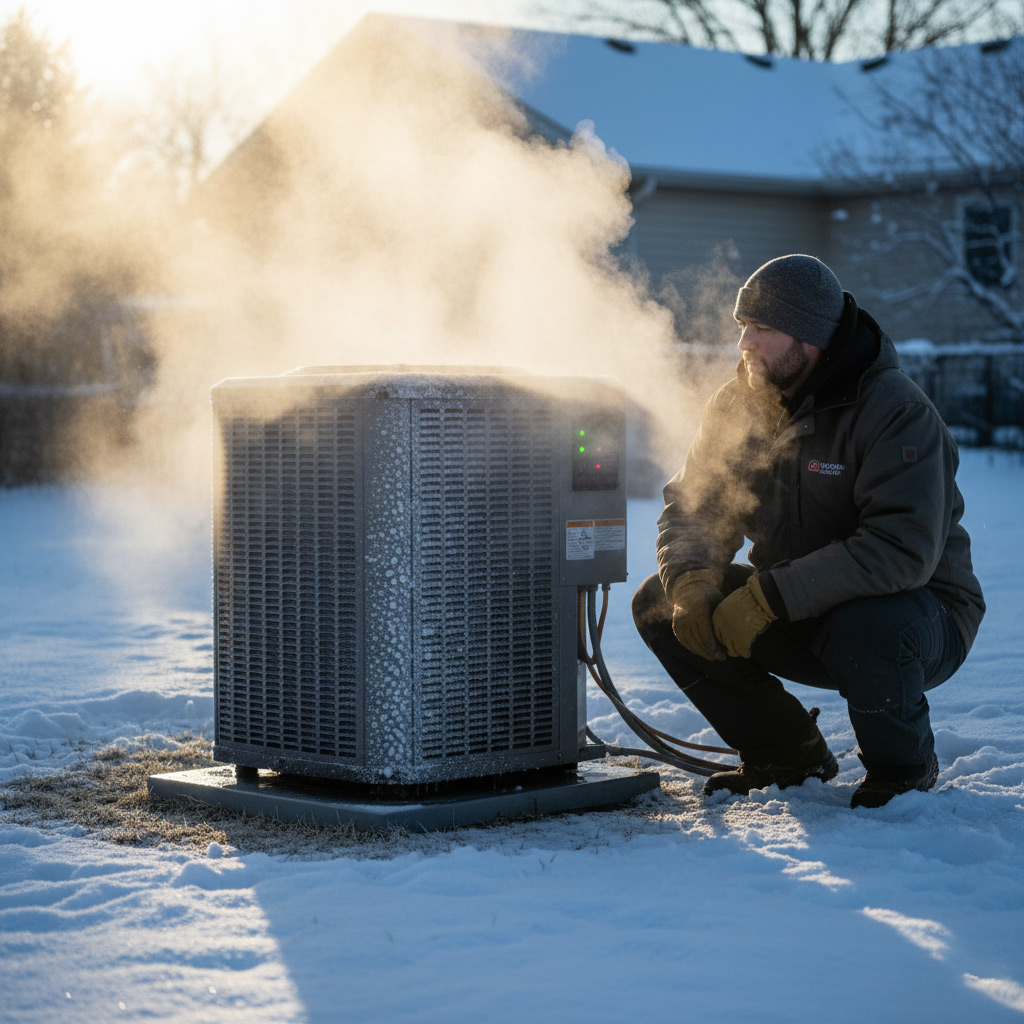
Mechanical Diagnostics: Compressor, Fan Motor, and Refrigerant Levels
Compressor Check
When the compressor hums but never kicks into high gear, you’ve got a red flag. Listen for a steady, low‑pitched thump—that’s the heart of the system trying to pump.
- Warm to the touch after a few minutes? It’s overheating.
- Tripping the high‑pressure switch? Pressure is out of whack.
- Visible oil leaks? The seals are giving up.
Fan Motor Health
The fan motor is the unsung hero that pushes air through your ducts. If it sputters or stalls, you’ll feel the difference instantly.
- Check the capacitor—bulging or leaking means no start boost.
- Spin the blades by hand; they should turn freely.
- Listen for grinding noises; bearings might be worn.
Refrigerant Reality
Low or overcharged refrigerant is the silent killer of cooling performance. You can’t see it, but you can feel the loss of chill.
- Ice forming on the evaporator coil? Too much refrigerant.
- Warm air blowing from vents? Low charge.
- Use a manifold gauge set—readings outside the manufacturer’s range call for a pro.
Case Study: Rapid HVAC Rescue for a North Las Vegas Homeowner
The Call
At 7 p.m., a frantic call came in from a family whose AC sputtered and then went silent while the desert sun hammered the roof. They were sweating, kids were restless, and the thermostat stubbornly read 85 °F. Our tech, Jake, arrived within 45 minutes, toolbox in hand, ready to hunt down the culprit.
What We Found
First glance revealed three red flags that any seasoned tech would spot:
- Tripped safety switch on the outdoor unit – the first line of defense had shut down.
- Dirty condenser coils – a layer of dust was choking airflow.
- Low refrigerant pressure – the system was practically starving.
Each issue alone could explain the loss of cooling, but together they formed a perfect storm.
The Fix & Results
We tackled the problems in a logical order, keeping the homeowner in the loop:
- Reset the safety switch and verified proper voltage.
- Cleaned the coils with a biodegradable coil‑cleaner; airflow jumped back to normal.
- Recharged the refrigerant to manufacturer specs and performed a leak check.
Within 30 minutes the unit roared back to life, dropping the indoor temperature to a comfortable 72 °F. The family breathed a sigh of relief, and we left a quick maintenance checklist to keep the system humming all summer long.
Final Words
When the desert heat turns your home into a furnace, the fastest way to regain control is to trust the checklist you just walked through. If any step feels beyond your comfort zone, pause—there’s no shame in calling a local pro who knows North Las Vegas quirks.
What to Do Next
- Re‑check the thermostat after each adjustment; a 2‑degree swing can reveal hidden calibration issues.
- Swap out filters every 30 days during peak summer; a clean filter is often the cheapest fix.
- Inspect visible wiring for scorch marks or loose connections before you touch anything else.
Remember, a well‑maintained system not only keeps you cool but also saves you from surprise repair bills. For deeper dives into specific problems, explore our essential piece of the HVAC troubleshooting puzzle.
People Also Ask
What are the first signs that my HVAC system needs troubleshooting in North Las Vegas?
Common indicators include weak airflow, unusual noises, and inconsistent temperature control. These symptoms often point to clogged filters, duct leaks, or thermostat misconfigurations.How can I verify if my thermostat is calibrated correctly?
Compare the thermostat reading with an independent room thermometer after the system has run for at least 15 minutes. If the temperatures differ by more than 2°F (1°C), recalibrate or replace the thermostat.When should I check the HVAC electrical components versus calling a professional?
Inspect circuit breakers, fuses, and safety switches for obvious tripped positions or burnt smells. If the system still won’t power on after resetting, it’s safest to contact a licensed HVAC technician.What does low refrigerant level feel like in a home’s cooling performance?
Low refrigerant typically results in reduced cooling capacity, longer run times, and the evaporator coil may ice up. This condition requires professional recharging and leak detection.How quickly can a qualified HVAC service restore comfort after a major system failure?
A reputable North Las Vegas HVAC company can often diagnose and begin repairs within a few hours, with most emergency fixes completed the same day. Prompt service minimizes downtime and prevents further damage.North Las Vegas HVAC brings over a decade of certified expertise to homes and businesses throughout North Las Vegas. Their team combines industry‑leading training with a deep understanding of the local climate to deliver reliable heating and cooling solutions. Committed to responsive service, they prioritize the comfort and safety of the community they serve.
Need HVAC?
We deliver rapid, results‑focused solutions that keep your home or business running smoothly in North Las Vegas (89030, 89031, 89032, 89081, 89084) and nearby areas. Our team prioritizes speed and quality so you can move forward without delay.
Request a fast quote